Creating D2L Activities
Activities, files and links can only be added to the content area once a module has been created. You can create web links and D2L-generated HTML documents, upload files, and add activities, such as discussions, checklists and dropboxes underneath modules.
Creating Activities Tutorial Video
Click to watch a video exploring the activities of D2L
Step 1
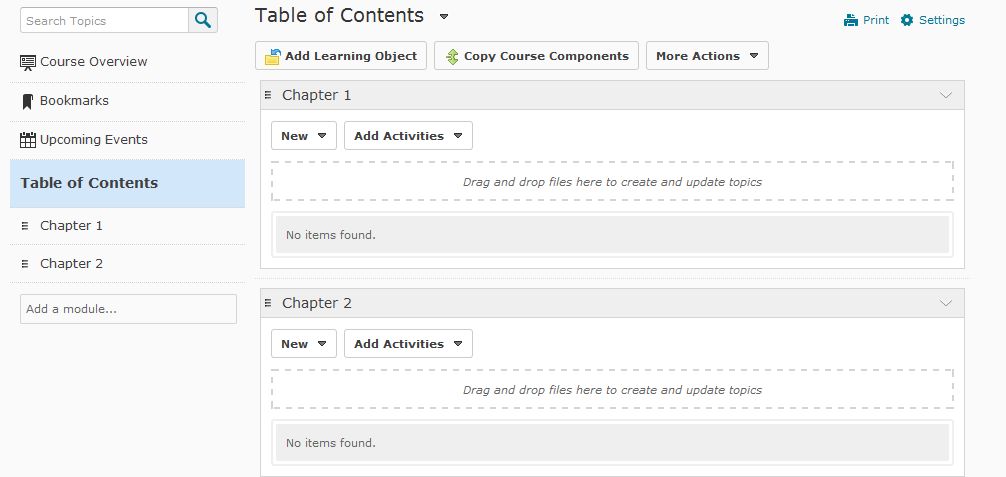
Navigate to the Content area of the course and locate the module you want to add a file, link, or activity to in the Table of Contents from the menu on the left-hand side, or within the full list in the center of the page.
Step 2
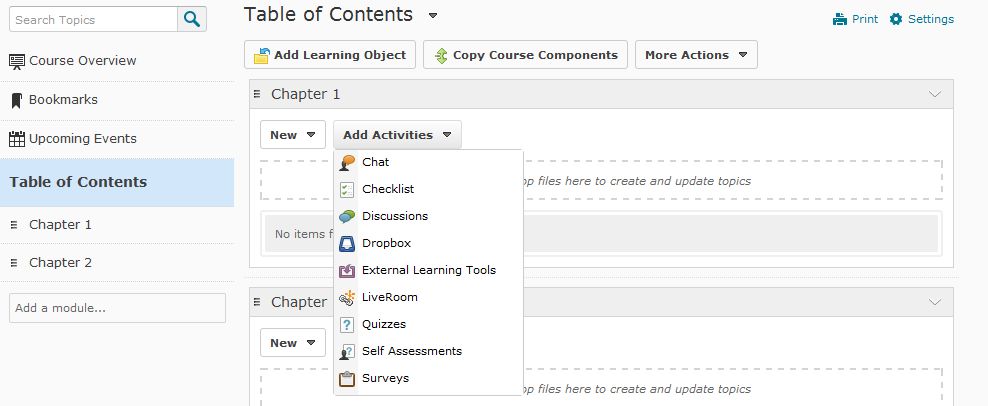
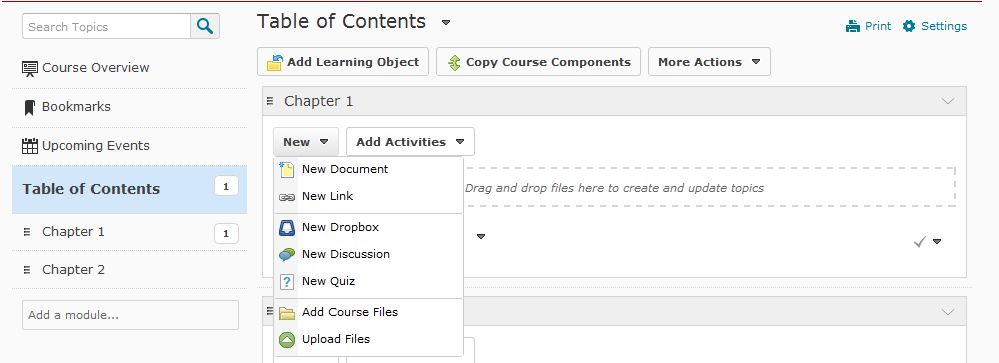
To add an activity, select the desired activity you want to add from the Add Activities dropdown menu beneath the appropriate module.
Step 3
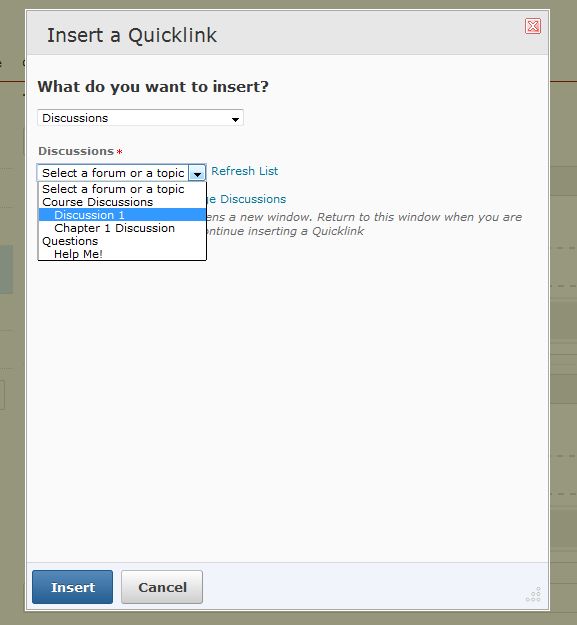
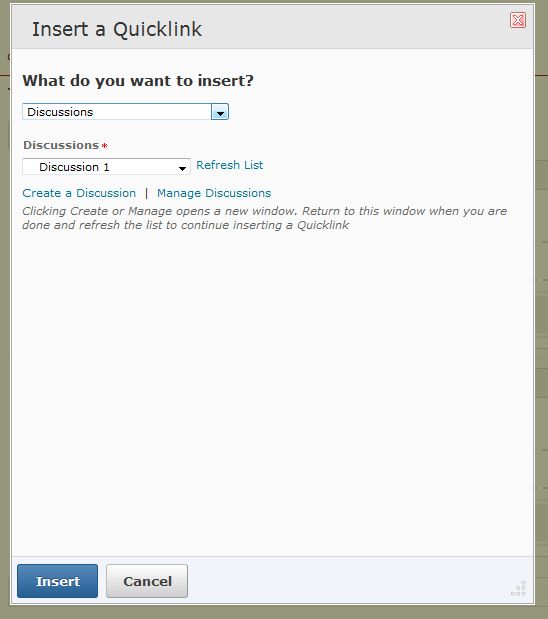
In this example, we selected to add a Discussion to the content area. In the Insert a Quicklink window, use the dropdown menus to select the specific discussion to link to within Content.
Step 4
Click on the Insert button.
Step 5
Your new activity will now appear in the Table of Contents beneath the assigned module.

Step 6
To upload a file or multiple files to the Content area, drag and drop the file(s) directly into the appropriate module in the Table of Contents.

Step 7
Alternatively, to upload a file or files, click on the Upload Files option from the New dropdown menu under the appropriate module.
Step 8
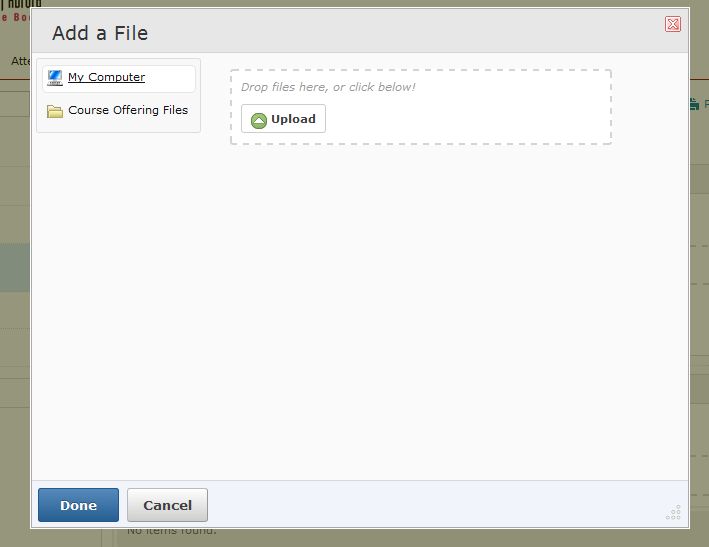
Select whether you will upload files from your computer or from the course offering files, which are files you uploaded directly into the Manage Files area. Click on the Upload button to browse for the file(s) or drag and drop the file(s) directly from the computer. Then click the Done button.
Step 9
You will now see your file in the Content area of your selected module.

Step 10
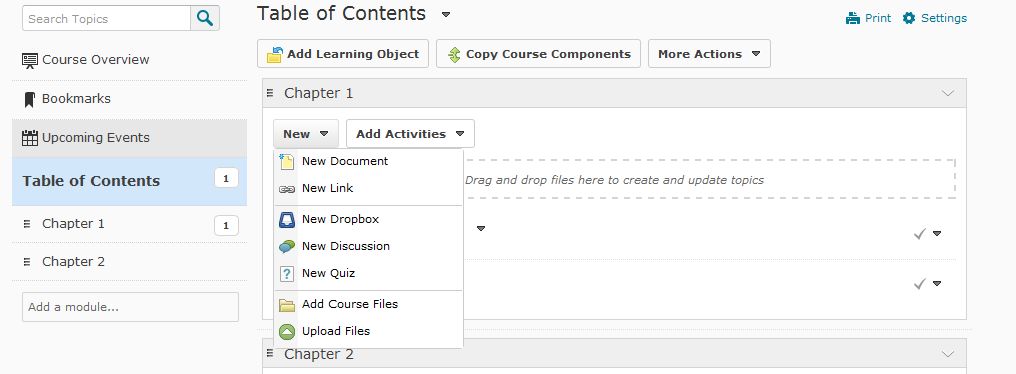
To create a D2L document or to add an outside web link in the Content area, also use the New dropdown menu in the desired module to complete your action.
Step 11
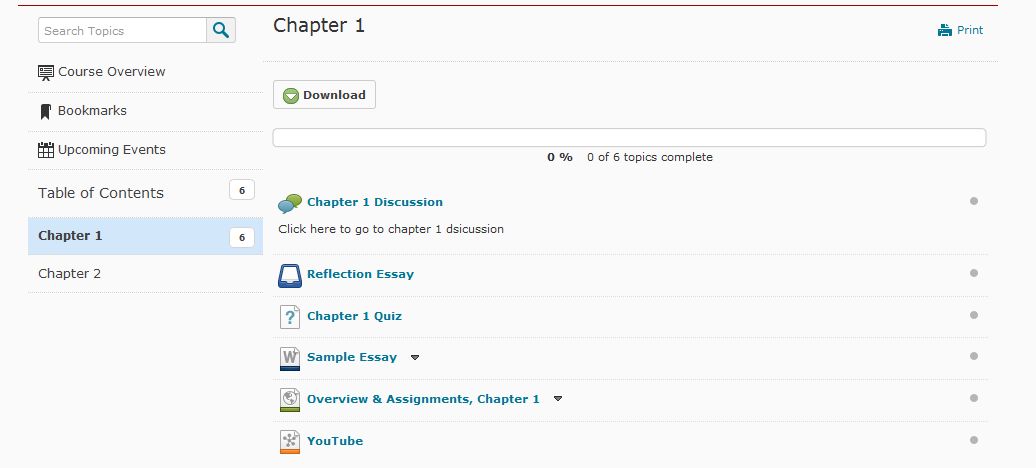
Content area from a student viewpoint:
